|
This page is here temporarily, until the clever guys at Two Big Ears fix
their FB360 Encoder app,
|
Starting with version 3.00, VLC Mediaplayer supports panoramic video with spatial audio soundtrack embedded with panoramic 360 videos, which contains 16 channels, but requiring:
It must be noted that currently the only container capable of embedding an high-resolution panoramic video and a 16-channels high-quality soundtrack (uncompressed PCM at 48 kHz, 24 bits integer or, better, 32-bits float) is a MOV container: MP4 or other "modern" containers do not support such a 16-channels soundtrack.
It must also be noted that the current version 2.1 of the Google Metadata Injector only supports first-order Ambix (4-channels) with 2 optional additional channels of "head locked" stereo (the new 6-channels Youtube format), as described in this web page.
Here we provide the information and tools required for creating a MOV file containing the 16-channels Ambix 3rd order soundtrack, including the command for FFMPEG for assembling the audio and video files, and the modified Google Metadata Injector suitable for 3rd-order metadata.
Today a number of hardware and software tools exist for creating an high-quality 3rd-order Ambix soundtrack (16 channels). Here we describe 3 approaches:
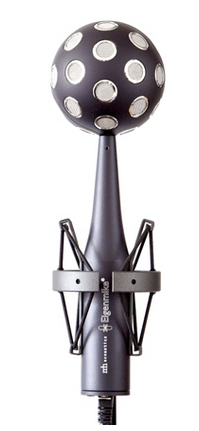
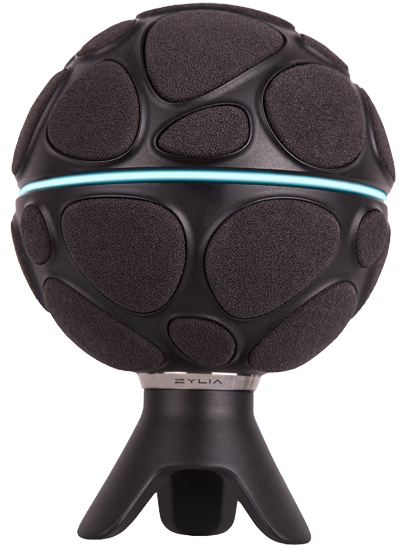
Apart some experimental systems developed in various research centers, the market provides two high-resolution microphone arrays, shown here
|
|
|
| The Eigenmike-32(TM) | The Zylia ZM-1 |
These microphones come with crap proprietary software which converts the raw signals coming form the capsules (which are 32 for the EIgenmike and 19 for the Zylia) into standard Ambix 3rd order (16 channels). But of course the same conversion from A-format to B-format can be done employing a standard matrix convolver plugin (such as X-Volver, MCFX, Sparta MatrixConv, Aurora for Audacity or X-MCFX) and the filter matrices made available here (for the Eigenmike) and here (for the Zylia).
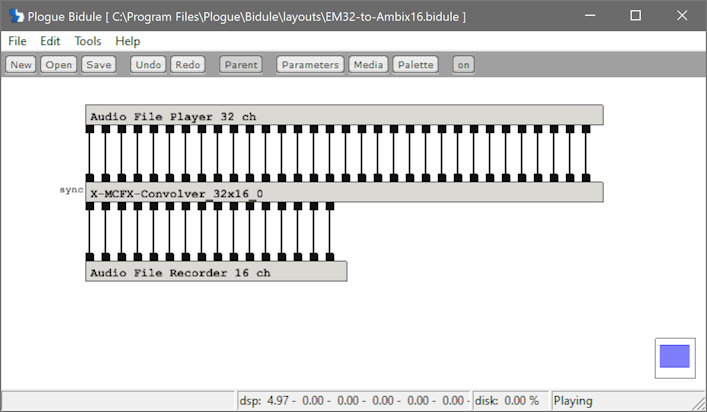
This web page shows how to use one of these matrix convolution plugins for performing the conversion.
Despite the availability of the massive microphone arrays described here above, many people are still using lower-resolution microphone arrays, capable of just first order (4 channels) or of almost-second-order (8 channels, whilst full 3rd order would require at least 9 capsules). A number of software tools are available for upscaling first order (and, in some cases, second order) to full 3rd order:
The usage of these plugins is straightforward: you feed them with a low-order Ambix stream, and they provide an "upscaled" higher-order output stream. Of course you need to use an host program which manages plugins having a number of output channels larger than the number of input channels.
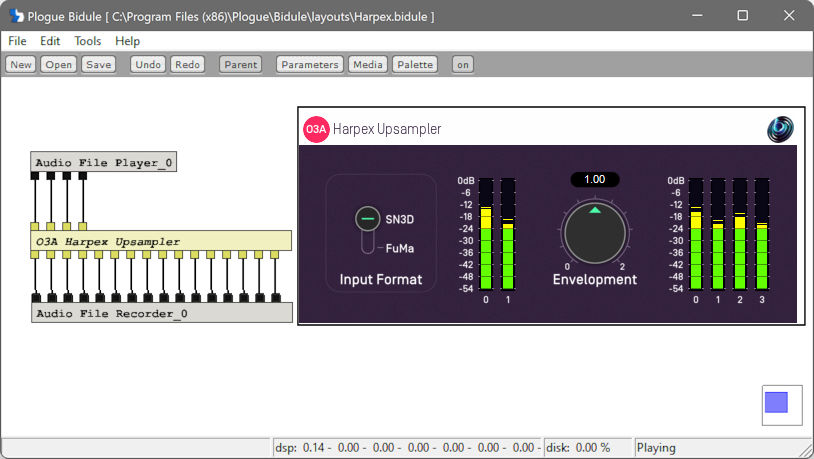
It must also be said that the results of these "upscaling" parametric algorithms is not always optimal: they get confused in case of complex scenes, with many sources in different locations emitting similar sounds. In some cases, the first order original signal remains preferable to the upscaled version.
In many cases, the best results are obtained starting form one or more clean mono tracks, recording "at the source" with close microphones. Each of these mono tracks is then "encoded" to 3rd order Ambix employing some sort of "panner" or "spatialiser" tool. Here the number of available software tools capable of this kind of "spatial positioning" is huge, so here I cite just some of them, and I apologise for omissions.
Free tools:
Commercial tools:
Further processing is often required, performing tasks
such as level control, compression, equalization, adding reverb, denoising,
etc... For performing these tasks most DAWs and plugins are not suitable, due to
the large channel count, and to the need of preserving carefully gain and phase
matching among all these channels. Only a few host programs and a few
mulichannel plugins are suitable for such kind of post-processing of Ambix 3rd
order tracks:
Multichannel DAWs capable of managing properly 16-channels soundtracks:
Multichannel plugins capable of managing properly 16-channels soundtracks:
If you instead want to use plugins which are not properly desigend for processing AMBIX soundtracks, a method for using standard plugins, based on the SPS approach, is presented in this web page.
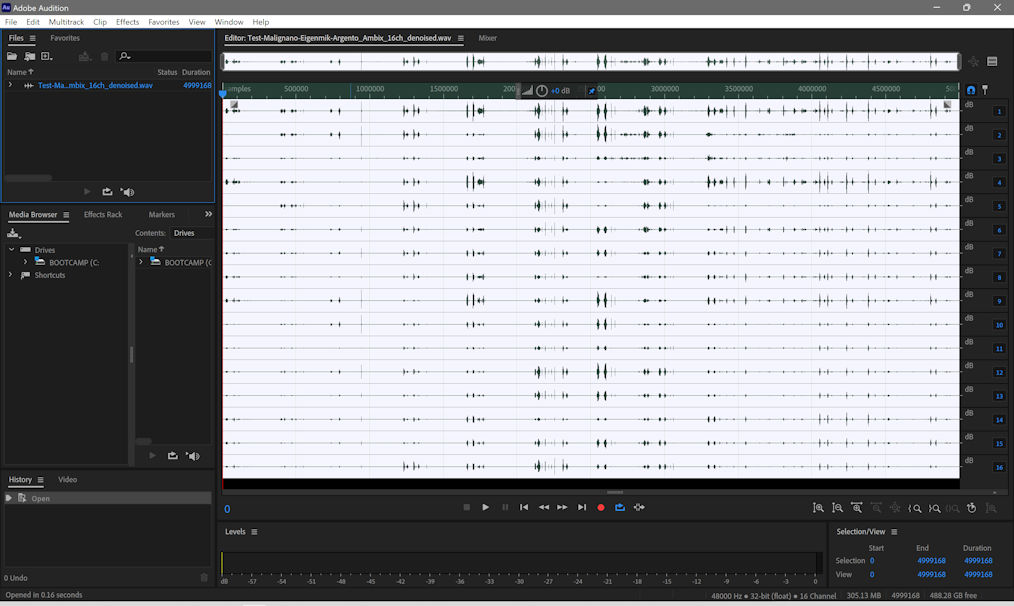
Here an example of a 16-channels Ambix soundtrack (recorded using an Eigenmike and with minimal post-processing):
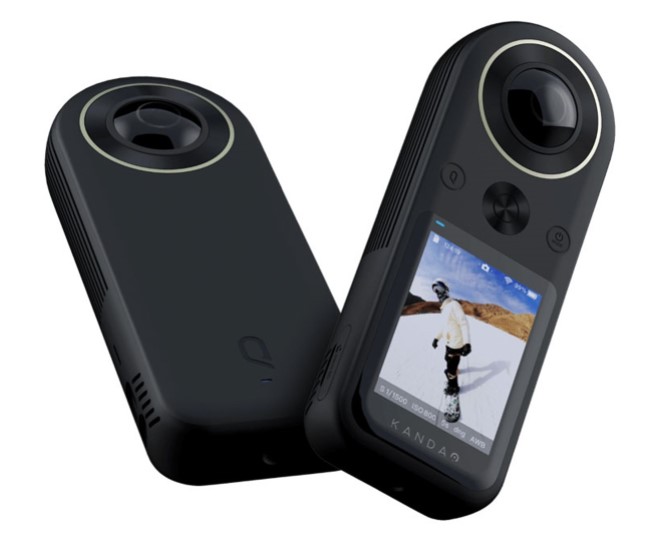
Today a number of cameras are available, capable of recording a panoramic equirectangular video of proper resolution (currently the minimum for decent rendering on an Oculus Quest 2 HMD is 5.7k, but 8k is highly recommended).
This article provides a short review of today's consumer-grade panoramic cameras.
I own substantially all of them, and my favouruìite one, providing the sharpoest image and pretty good colours, is the Kandao Qoocam 8k:
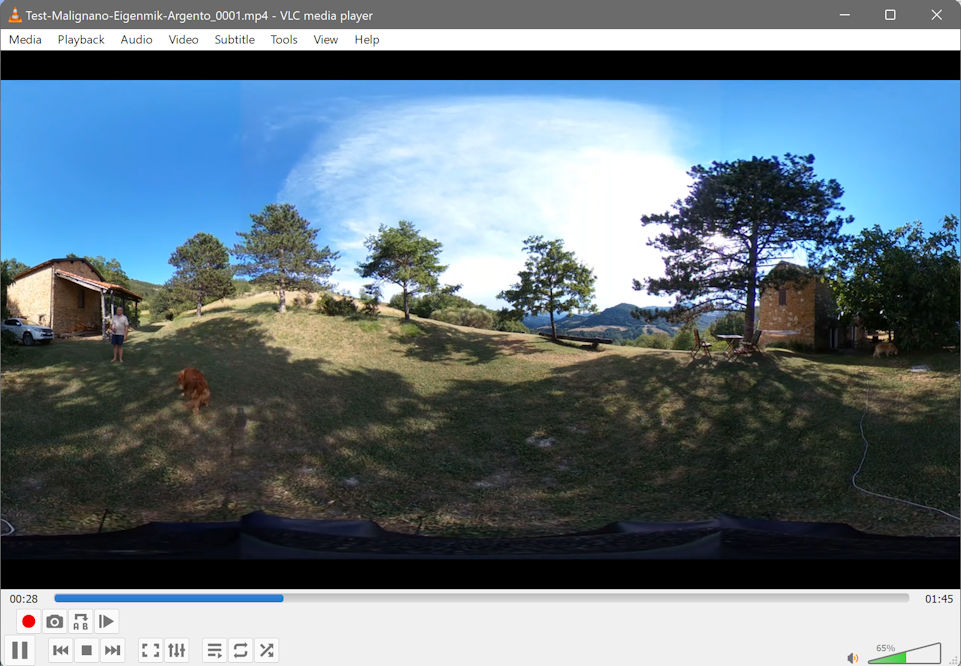
The resulting
video file is an MP4, containing an H264 or H265 video stream, in
equirectangular format, with a resolution of 7680x3840 at 30 FPS.
If the video file is not injected with proper "panoramic" metadata, VLC
Mediaplayer will not recognize that it is a 360-degrees equirectangular video,
and will display it "strecthed out" as here:
Although the operation of merging the 16-channels audio track with the video track can be done employing almost any serious video editor (for example Adobe Premiere), in this guide we favour open-source software. Which, indeed, provides much better control on what is done, and avoids to decompress and recompress again the video stream (causing significant loss of quality).
FFMPEG is perfect for this, as it allows to mux the two streams without applying any modification to them.
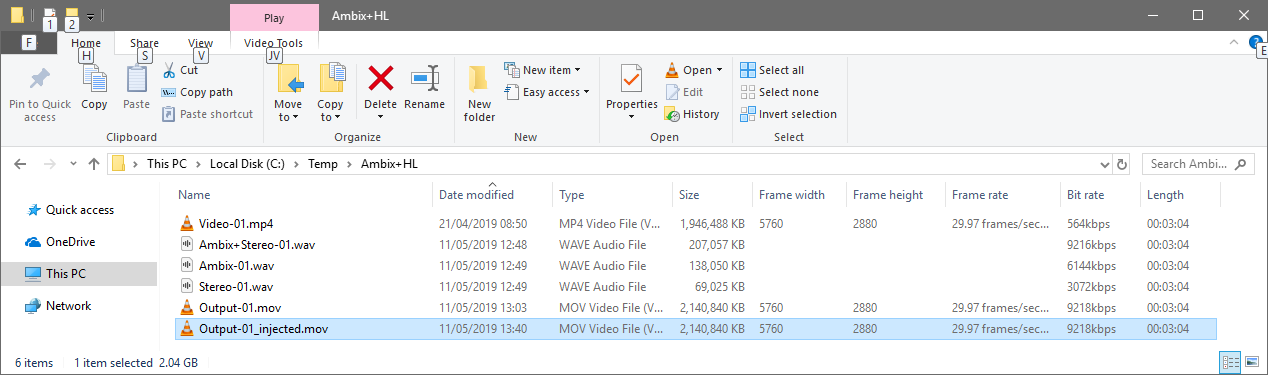
After installing FFMPEG and having it being properly inserted in the PATH of your computer, so you can launch it form any folder, you simply open a console window, navigate to the folder containing your audio and video files, and type the following command:
|
ffmpeg -i Video-01.mp4 -i Audio-01.wav -map 0:v -map 1:a -c:v copy -c:a copy -shortest Output-01.mov
|
In just a few milliseconds FFMPEG will write the new muxed Audio + Video file inside your folder.
But this new video file IS NOT READY for playback yet, as it has to be properly "injected" with the required metadata, so that VLC Mediaplayaer (or Vive Cinema) will "understand" that the 16-channels audio track is in Ambix 3rd order format.
The .mov file needs now to be injected with proper metadata. This is done using my modified version of the Google Metadata Injector v. 2.1 (do not use previous versions, nor the Google's official release, as they do not support the Ambix 3rd order 16-channels format).
The Metadata Injector is a Python 2.7 script.
I compiled it to an EXE file, so, if you use a Windows machine, just DOWNLOAD THE EXE HERE and launch it.
If you use a Mac, be aware that, on the latest versions of Mac OS, Python 2.7 has been removed, so even if you can download the ZIP file containing this special version of the Metadata Injector, you will have some problems riunning it. If you manage to install Python 2.7, then unzip it to a folder, navigate to the subfolder named "spatialmedia" and double click on the "gui.py" script.
In both cases, when you launch the Metadata Injector you will see the following window, where you can open your MOV file and specify the metadata to be injected, as shown here:
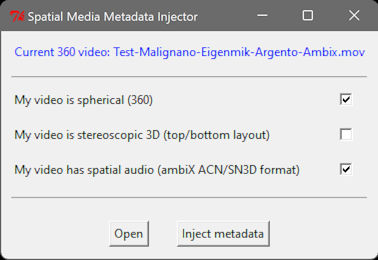
At this point, clicking on the "inject metadata" button, a new version of the mov file is created, with "_injected" added to its name.
THIS IS THE GOOD FILE to be watched with VLC mediaplayer or with Vive Cinema (using a tethered HMD and a good pair of headhones).
Thanks to the metadata, VLC now undertand the nature of the audio+video file and allows to watch it through a movable viewport, which can be dragged around for exploring the 360-degrees scene. The audio is rendered accordingly to the video, resulting in sharp localization when the user is wearing good headphones.

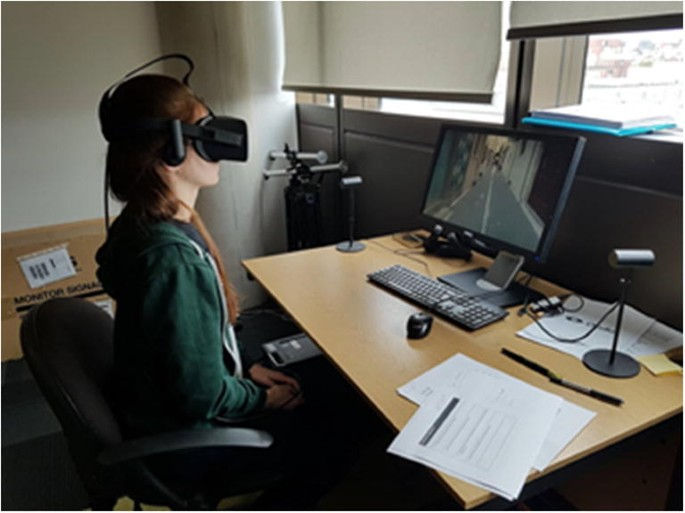
But, for the best viewing and listening experience, you should use a tethered HMD, (such as the Oculus Quest 2 with the Oculus Link cable), and the open-source software Vive Cinema by Andre Chen, so the user experience will be like here:
And if you have your own set of personalized HRTF filters, and your own personalized heapdhones EQ filters, you can enjoy acoustical virtual reality at its maximum level, tanks to this special modified version of Vive Cinema, which allows to employ such personalized digital filters instead of the "standard" ones.
This paper provides explanation of these modifications and discusses the benefits obtained when head tracking, personalized HRTF and personalized headphones eq are all employed simultaneous with 3rd-order Ambix recordings.
All the contents are Copyright by Angelo Farina, 2021