|
This page is here temporarily, until the clever guys at Two Big Ears fix
their FB360 Encoder app,
|
Starting in August 2018, Youtube supports a new hybrid format for the spatial audio soundtrack embedded with panoramic 360 videos, which contains 6 channels:
When uploading videos to Youtube supporting this new
6-channels format, the usage of a MOV container with uncompressed PCM audio, at
48 kHz, 24 or 32 bits, is highly recommended for preserving the best sound
quality.
Google provides a new
version of their Metadata Injector V. 2.1, which now allows to specify that
the video contains this new hybrid 6.channels audio track.
A modified version of this new Metadata Injector has been released by Angelo Farina, supporting Ambix up to third order (16 channels) - this is not yet supported by Youtube, but can be enjoyed in local playback using Vive Cinema, VLC Mediaplayer or Gopro VR Player apps.
Here you can download this extended High Order version of the Metadata Injector.
And here you find a guide on how to prepare such a file containing panoramic video and third-order Ambix for Vive Cinema, Gopro VR Player or VLC Mediaplayer.
The present guide, instead, is limited to First Order Ambisonics plus head-locked stereo, as currently supported by Youtube. And for this goal, the standard Metadata Injector v. 2.1 provided by Google is good enough, although, of course, you can also use my new High oder Metadata Injector. We also need two other free, multi-platform and open source programs, Audacity and FFMPEG, as explained here below.
Most people traditionally prefer to edit separately the Ambisonics "spatial audio" soundtrack and the stereo head-locked soundtrack. Hence the results are typically two separate .WAV files, one is a 4-channels Ambix, the other is a plain 2-channels stereo.
More recently, people started working at Third Order Ambisonics, hence the Ambix soundtrack will have 16 channels, not just 4. In tjis case, you firs need to convert Third ORder to First order, which is done esaily just jkeeping the first 4 chanenls of the 16-chanenls third order WAV file.
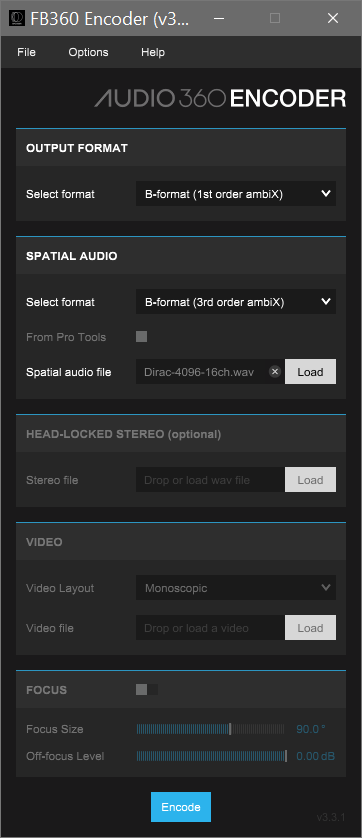
There are many ways of performing this. One is using the FB360 Encoder free program (it is part of the FB Spatial Workstation). It has the option of converting an input 3rd order Ambix (16ch) to an outpout 1st order Ambix (4ch), as shown here:
The other simple way is to import your 16-channels WAV file in Audacity, which will split it in 16 mono tracks. Then you simply close tracks 5..16, and you end up with just the first 4 channels. At this point you can export them as a single 4-channels WAV file, or, better, you directly pack these 4 channels with the additional 2 channels of HL stereo, as explained here below.
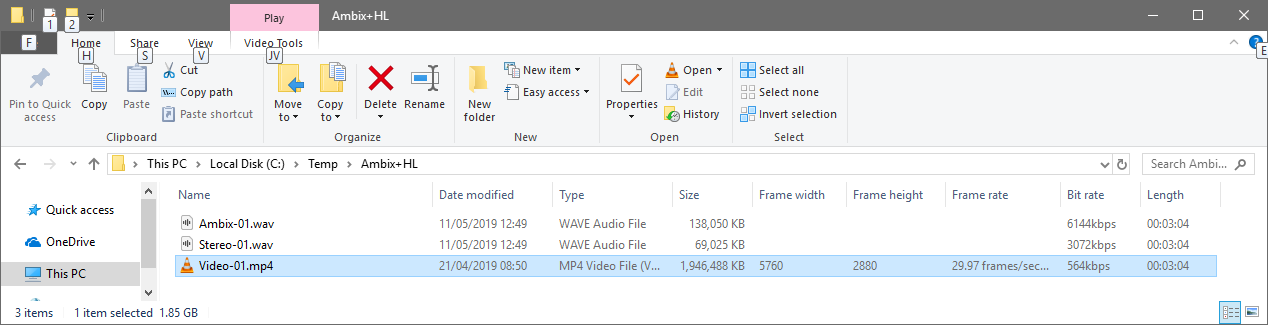
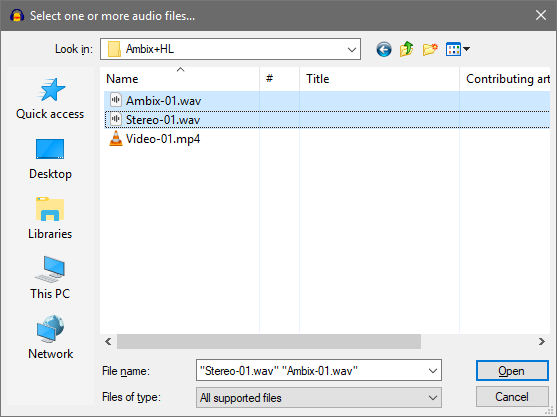
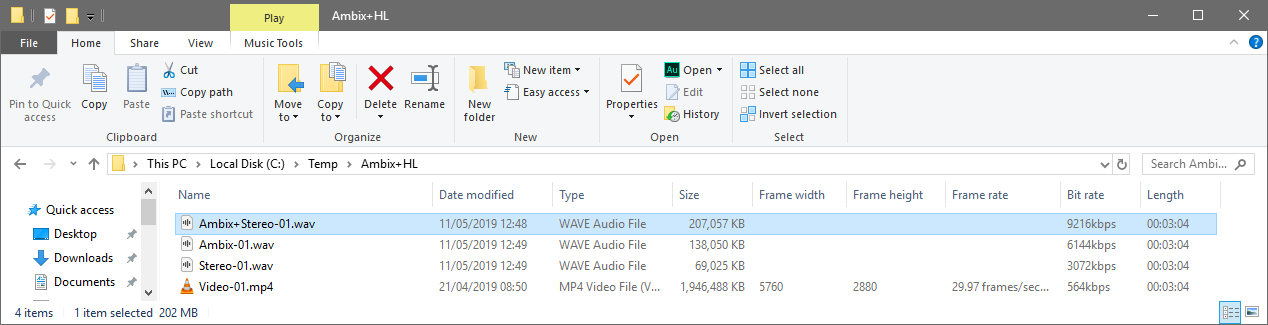
Let's assume that they are named
Ambix-01.wav and Stereo-01.wav. And of course there is also a video-only file,
typically saved as an .mp4 file containing a video stream compressed with H264
or H265 codec.
So a typical folder containing the streams to be assembled is as follows:
It is not possible to assembly directly the two audio files together with the video file: first it is required to "pack together" the two audio files, inside a single 6-channels .WAV file.
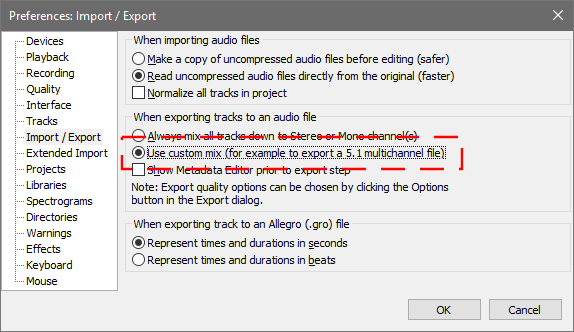
This is done easily employing the free, open source program Audacity. There is just one simple trick: after installing Audacity, it is necessary to remove one default setting, which causes to "downmix" everything to a single stereo output file, forcing the program to save instead a true multichannel file.
This is done opening the preferences of Audacity, and selecting the option labelled "Use custom mix (..)"
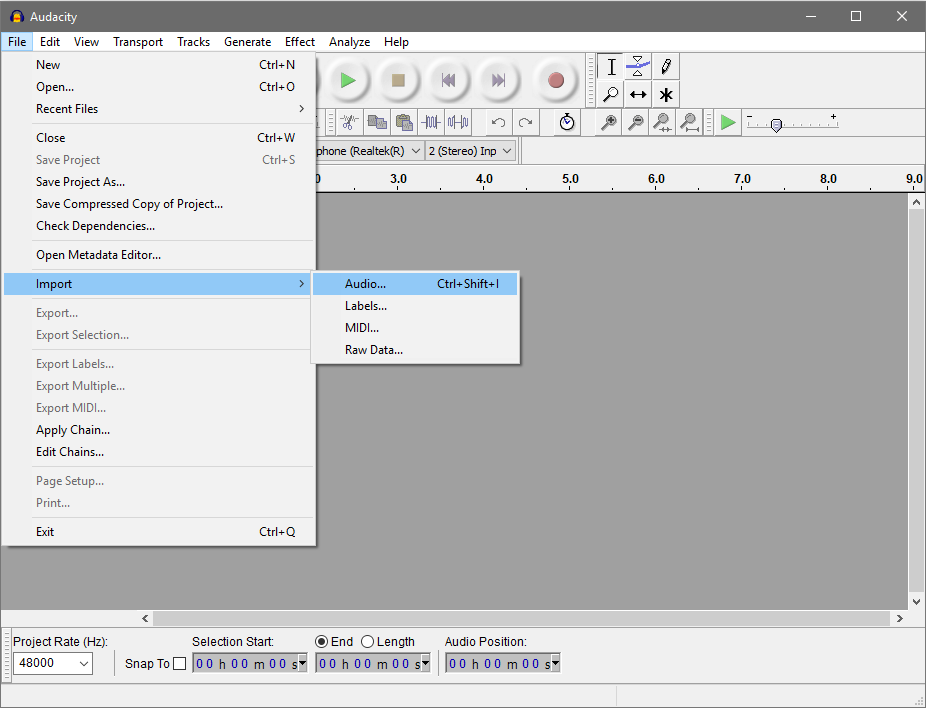
After setting up Audacity as shown here, the task is trivial: just IMPORT in Audacity your two WAV files (using File - Import - Audio) as shown here:
Select the TWO wav files:
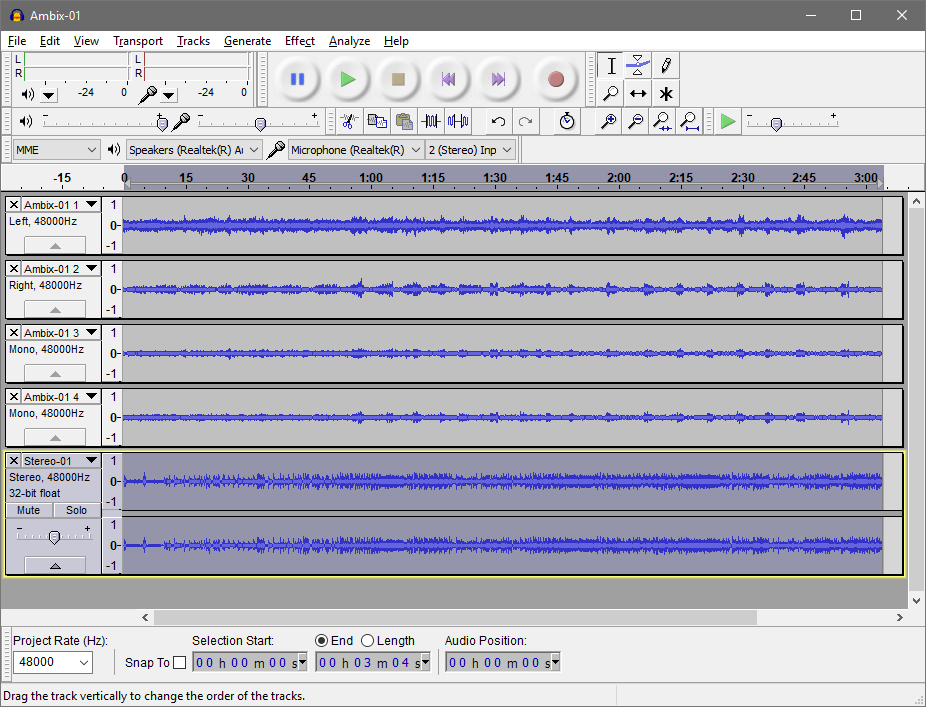
And here is what you get:
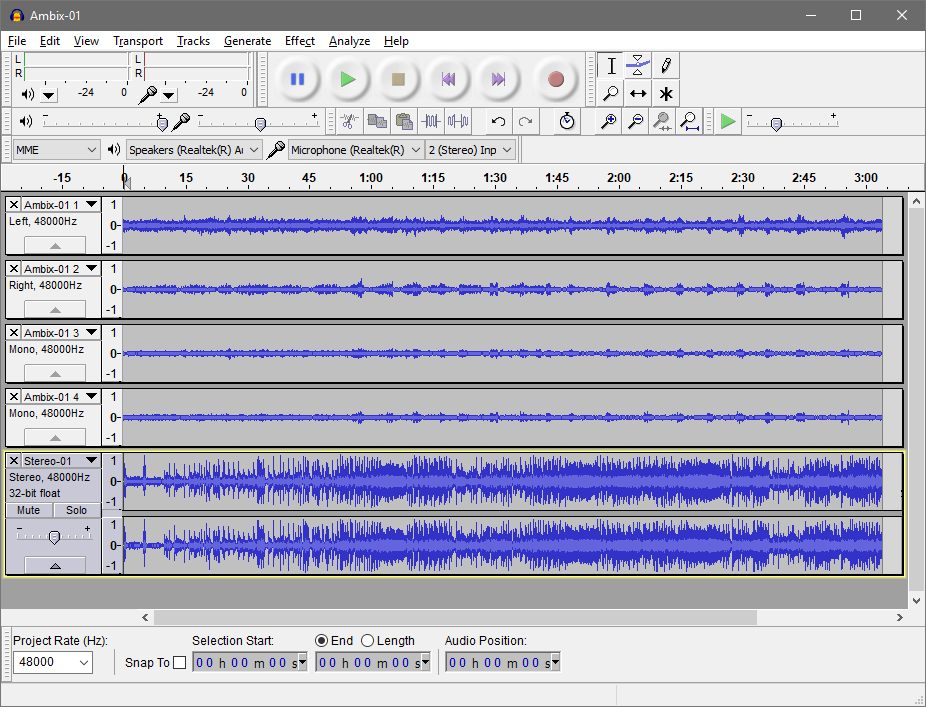
It can be seen how the 4-channels Ambix file was split into 4 mono tracks (as Audacity is yet uncapable of keeping more than two channels inside the same track), whilst the following 2-channels headlocked file was opened as a single stereo track.
In case the Ambix track was 16-channels (3rd order) instead of 4-channels (1st order), after importing you see the following:
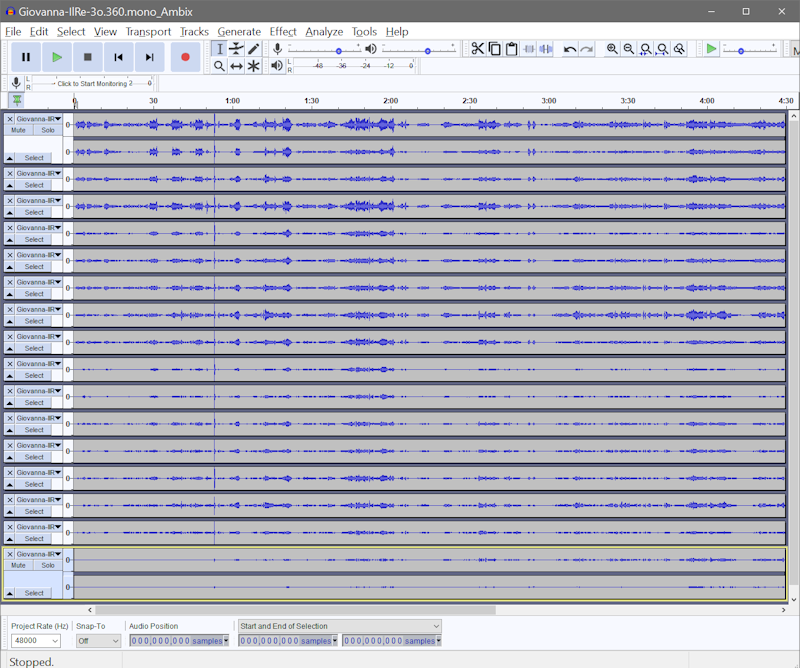
You can now simply remove, by clicking on the "X" on the left, all channels ranging from 5 to 16, leaving the first 4, and the last two (HL stereo). So you are back at the same situation as in the previous picture.
Now it is possibly the moment where the relative gains of the two "ingredients" are adjusted. In fact, typically the stereo track is too loud, and the Ambix soundtrack is too weak for being played simultaneously.
The head-locked sound should be very gentle, for avoiding to disrupt the capability of the Ambix soundtrack of giving the listener the impression of "being there" inside the spatial environment shown in the video.
But of course this is left to the taste of the sound designer...
In this example, it resulted advisable to reduce the gain of the Stereo Head-locked track by 10 dB. So I selected just the stereo track, and applied gain reduction using the command Effect - Amplify...:
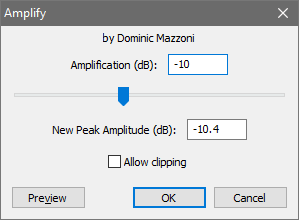
Remember that during playback these 6 channels will be downmixed to 2 and filtered with HRTF filters, hence the maximum level will peak much louder than the signal on any of the 6 channels. Hence it is absolutely to be avoided to "maximize the gain", as it is usually done when creating standard soundtracks in which each channel will be simply played by the corresponding loudspeaker. The Youtube Spatial Audio medium is significantly more critical than other media regarding the risk of clipping and distortion during playback, so we must be very conservative. My recommendation is to avoid any peak louder than -6 dB full scale, and possibly staying under -10 dB FS, as I did in this example. So these are the 6 channels after gain optimization:
We can now export the 6 channels into a single WAV file, using the command File - Export:
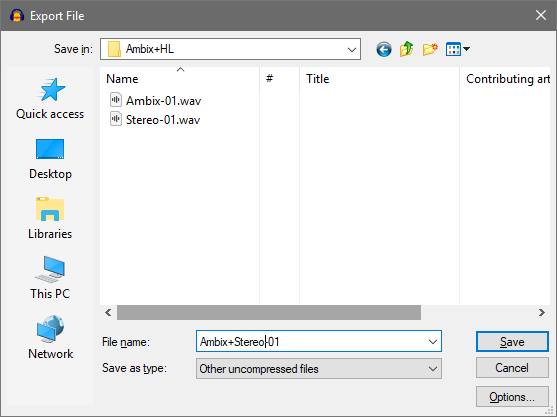
It can be seen how, for preserving the maximum sound quality, the output format was set to "Other uncompressed files". Under "Options", the following has been specified:
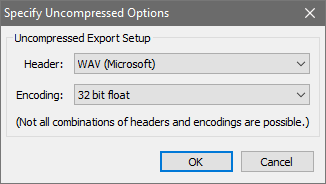
After clicking on the "save" button, the following picture is displayed, confirming that the 6 channels are being packed properly into the 6-channels output file:

And pressing finally on the "OK" button, the 6-channels WAV file named Ambix+Stereo-01.wav is created:
We are able now to pack together ("mux") the new 6-chanenls audio file together with the video file.
Although the operation of merging the 6-channels audio track with the video track can be done employing almost any existing video editor (for example Adobe Premiere), in this guide we favour open-source software. Which, indeed, provides much better control on what is done, and avoids to decompress and recompress again the video stream (causing significant loss of quality).
FFMPEG is perfect for this, as it allows to mux the two streams without applying any modification to them.
After installing FFMPEG and having it being properly inserted in the PATH of your computer, so you can launch it form any folder, you simply open a console window, navigate to the folder containing your audio and video files, and type the following command:
|
ffmpeg -i Video-01.mp4 -i "Ambix+Stereo-01.wav" -map 0:v -map 1:a -c:v copy -c:a copy Output-01.mov |
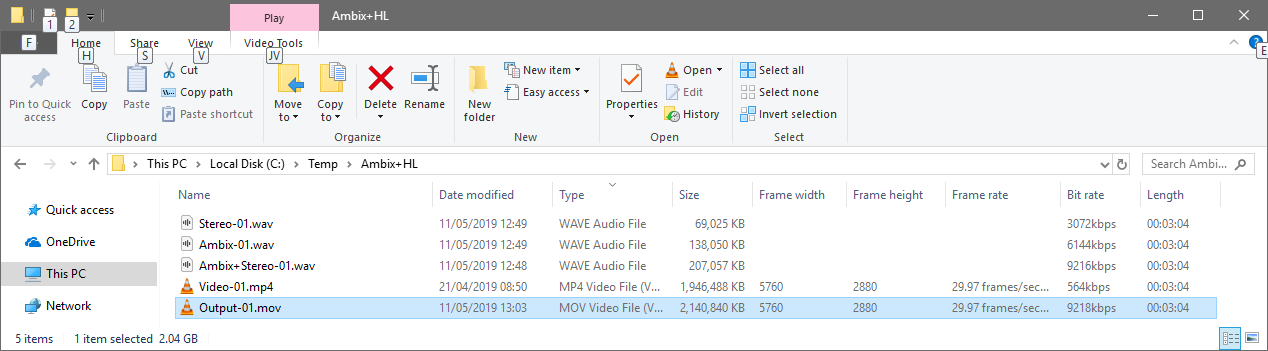
In just a few milliseconds FFMPEG will write the new muxed Audio + Video file inside your folder, as shown here:
But this new video file IS NOT READY for Youtube yet, as it has to be properly "injected" with the required metadata, so that Youtube will "understand" that the 6-channels audio track is NOT a 5.1 old-style "surround" soundtrack, and is instead the new Ambix+HL format.
The .mov file needs now to be injected with proper metadata. This is done using the Google Metadata Injector v. 2.1 (do not use previous versions, as they do not support the new Ambix+HL 6-channels format).
The Metadata Injector is a Python 2.7 script. This means that, for using it, you need first to install properly Python 2.7 (not Python 3.xx).
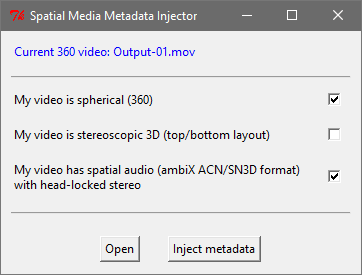
Then download from the GITHUB repository the ZIP file containg the proper version of the Metadata Injector for your operating system (WIndows or Mac). Unzip it to a folder, navigate to the subfolder named "spatialmedia" and double click on the "gui.py" script. This will launch Python and display the following window, where you can open your MOV file and specify the metadata to be injected, as shown here:
At this point, clicking on the "inject metadata" button a new version of the mov file is created, with "_injected" added to its name.
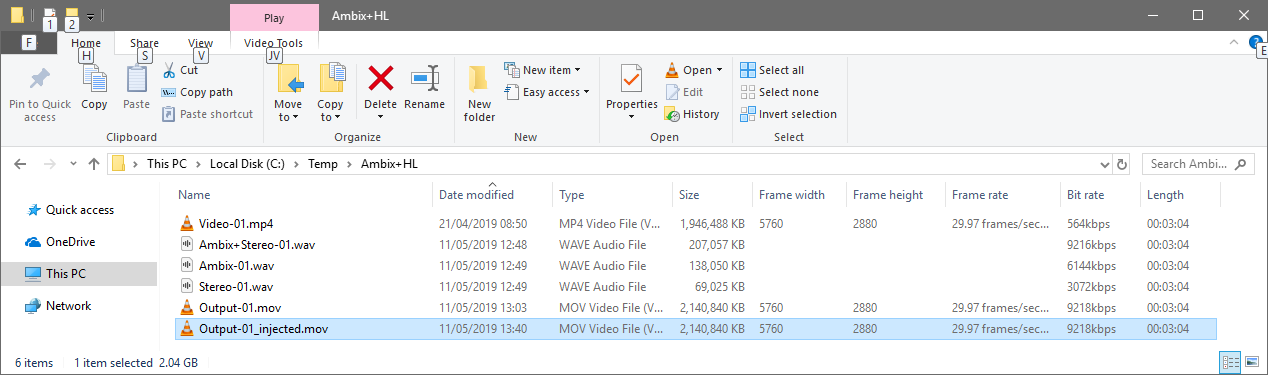
THIS IS THE GOOD FILE to be upoaded on Youtube!
All the contents are Copyright by Angelo Farina, 2019