How to easily measure your headphones on your own head and compute a set of FIR filters for equalizing their response
|
This is a guide on using Aurora plugins (www.aurora-plugins.com) for performing the measurments and for computing the two FIR filters which perfectly equalize the response of your headphones ON YOUR OWN HEAD. This is a "personal eq", which also removes the "pinna effect" of your ears. The resulting equalization is only suitable for listening to binaural sound, not to normal stereo.
In fact in any listening experience only ONE SET of pinnae should be present. In normal stereo listening, these are YOUR pinnae, and you should not remove their effect. Instead, when listening to binaural, the HRTF is already incuded in the sound being reproduced, so the colouring effect of your pinnae is detrimental, and should be removed.
Of course the best results are obtained when the binaural recording is already encoding your own HRTF filters, and this happens only in two cases:
1) you recorded the soundtrack while wearing binaural microphones in your ears (possibly the same microphones used for performing the headphones equalization)
2) the binaural recording is a rendering of an Ambisonics or SPS soundtrack, done employing your own individualised HRTF set, coming from measurements in an anechoic room or from computer simulations based on 3D scanning of your head and pinnae.
However, even when listening to binaural recordings made employing a "generic" HRTF set (for example the widely employed "dummy head" Neumann KU-100), your pinnae are detrimental to the listening experience, hence employing the FIR eq filters, computed following the procedure described here, becomes highly beneficial, both in terms of spectral neutrality of your headphones and in terms of spatial accuracy of the sound sources.
The hardware required are your own circumaural headphones, a pair of endoauricaular binaural microphones (possibly a DIY set) and a decent audio interface featuring good headphones output and stereo mic inputs (providing power to the microphones, if required). The following photos show the hardware required:
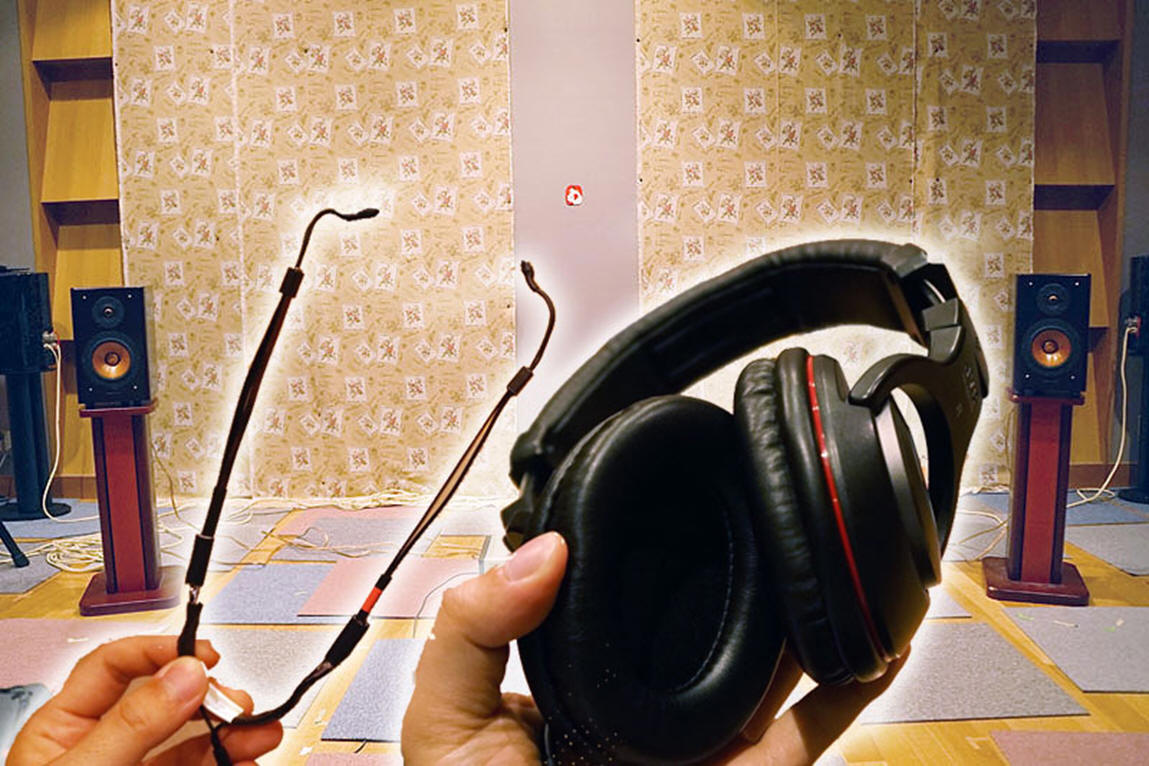
Endo-auricular binaural microphones (MEMS analogue capsules by Knowles) and headphones to be equalised.
The above photo is courtesy by JVC Kenwoood.

The Zoom F1, used here as a stereo USB interface. It has a stereo mini-jack input, featuring 2.5 V Plug-In Power. This is OK for powering the Knowles microphones shown in previous picture.
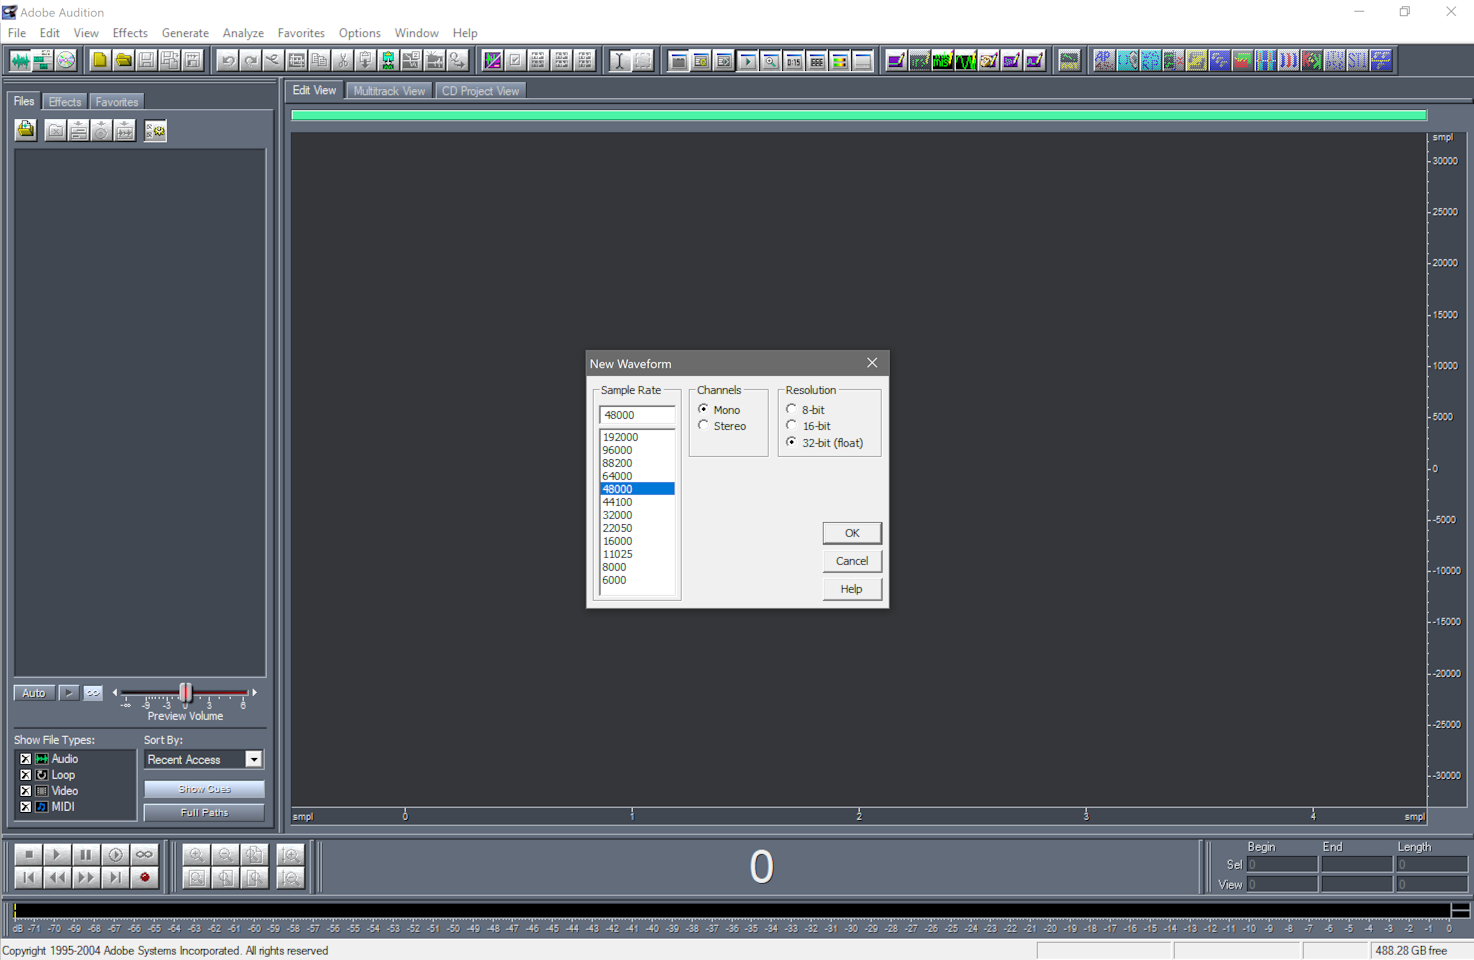
Coming to software, here we employed the very old host program Adobe Audition 1.5, with the following Aurora plugins:
- GENSWEEP
- CONVOLVE WITH CLIPBOARD
- INVERT KIRKEBY 4
Here the GUI of Audition, after pressing the icon for creating a new, empty, mono audio file:
The first thing is to wear properly the binaural microphones, before installing the headphones over your ears. Here a photo showing the microphones properly inserted inside the ear ducts:
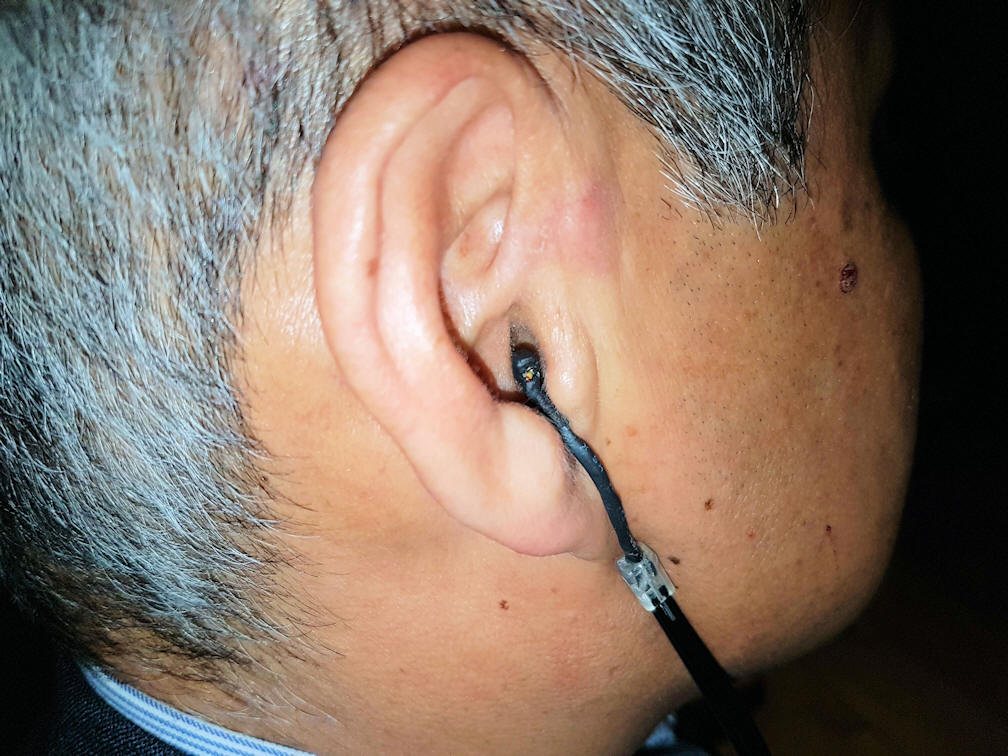
The microphones inside the ear ducts of an human.
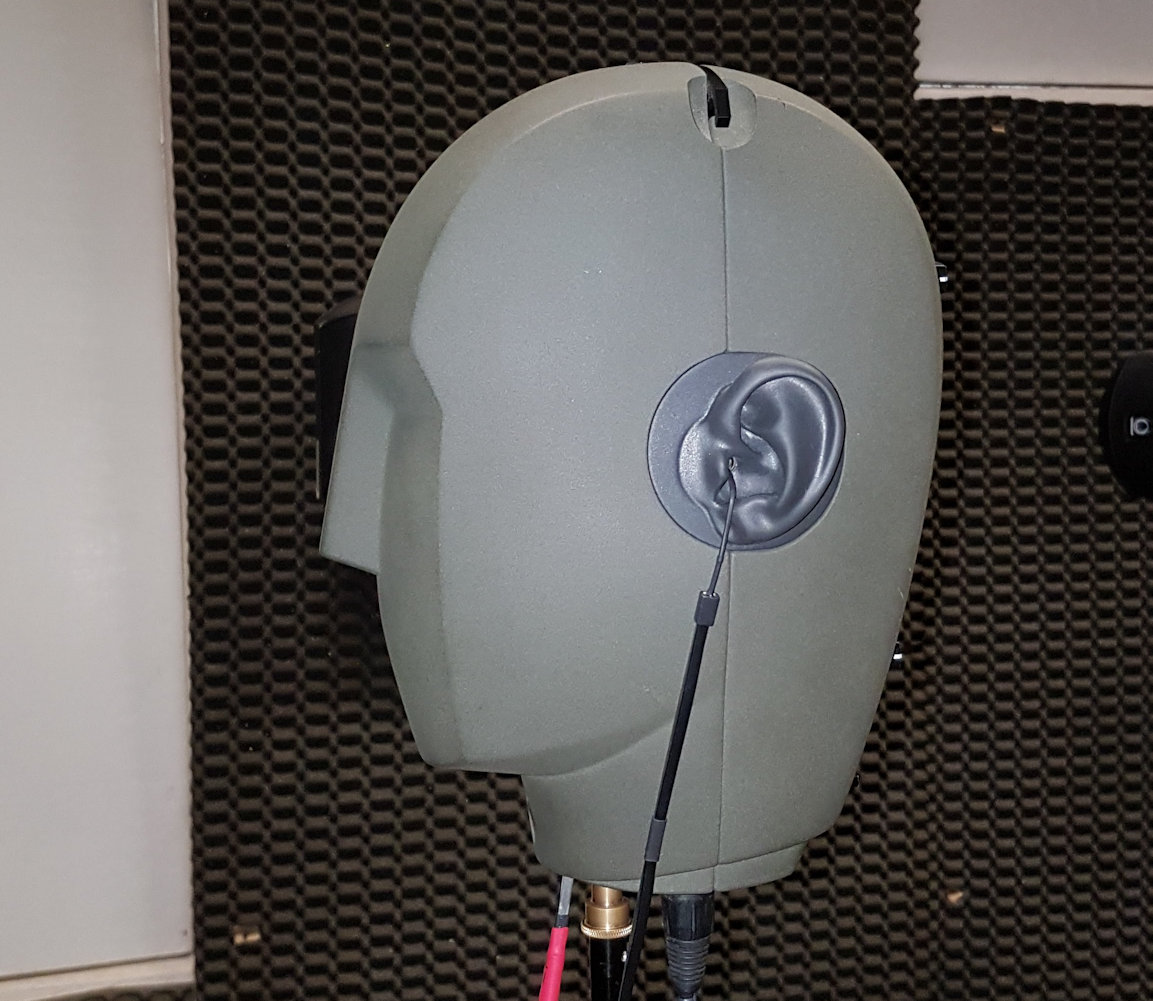
The microphones inside the er ducts of a dummy head (Neumann KU-100).
Now the headphones to be equalized are placed over the ears, attempting to not move the microphones outside their proper position in the ear ducts:

The headophones installed over the ears and over the binaural microphones.
At this point we can generate the test signal in the empty mono track in Audition, with the Aurora's Generate Sweep plugin:
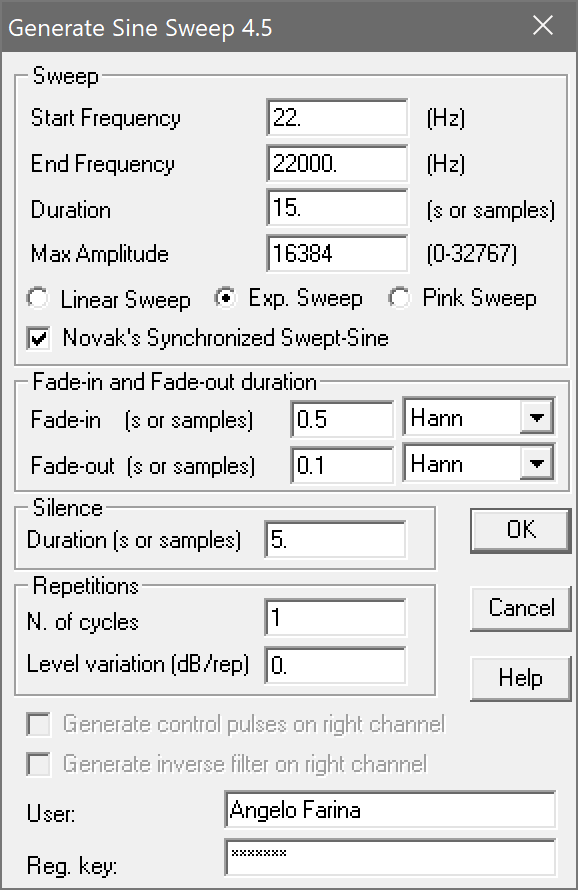
As shown here, the default settings of thw plugin have been kept unmodified.
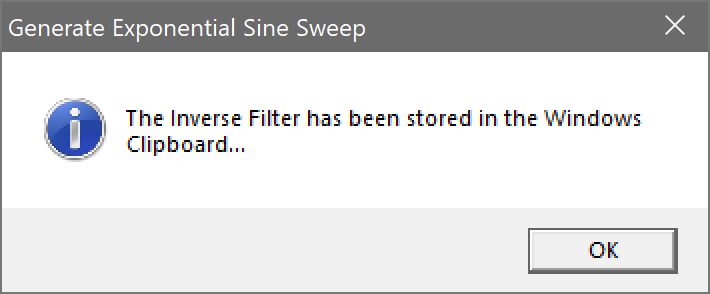
Pressing OK the sine sweep is generated, but, as shown here, the Inverse Sweep is also generated and automaticlaly loaded onto the Windows clipboard (be aware that Audition can also use a number of "internal" clipboards, hence if you want to access the Windows clipboard, for pasting the Inverse Sweep to a new waveform, you have to set Audition for using it, with the command Edit - Set Current Clipboard).
Here the generated Exponential Sine Sweep

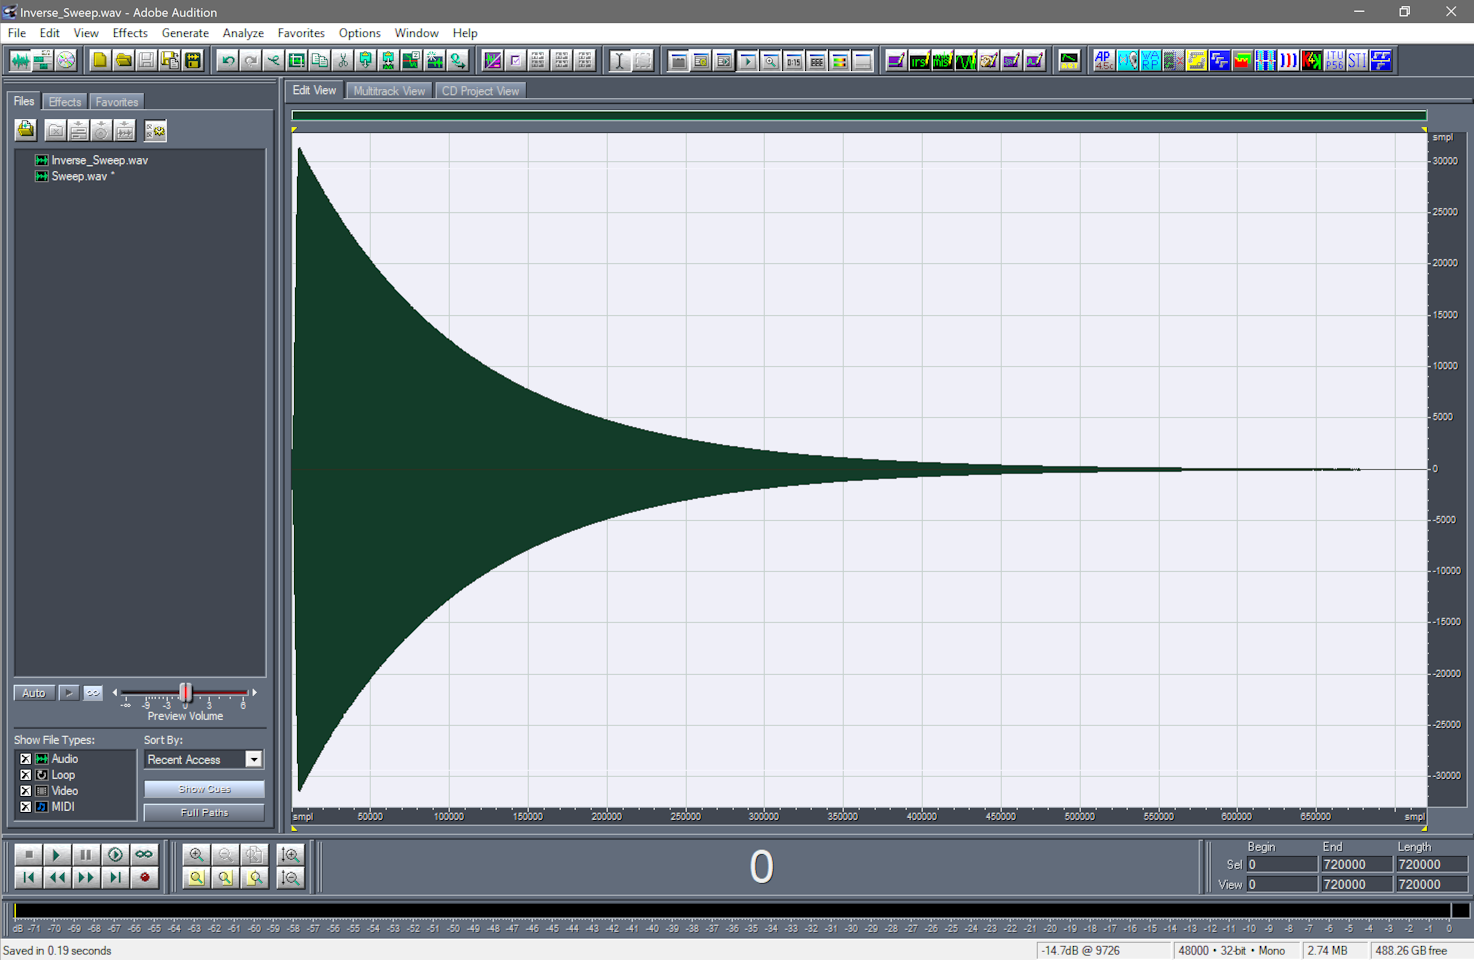
And here, the Inverse Sweep, recovered by the Windows Clipbopard with the command Edit - Paste to New:
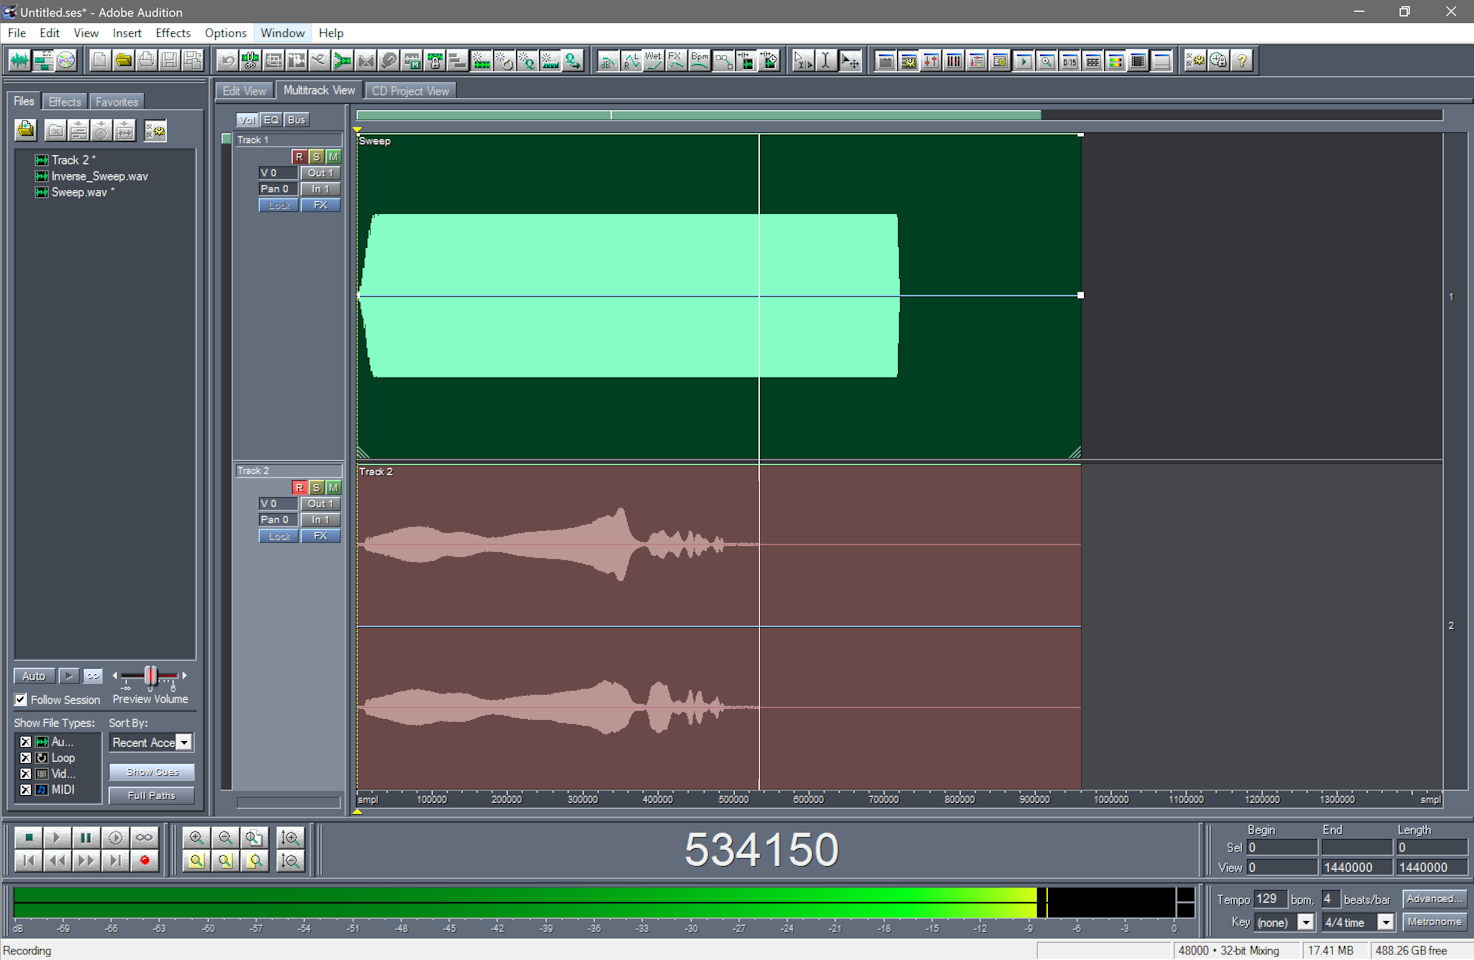
We can now perform the measurement. Audition is switched to multitrack mode, the Sweep signal is inserted in track 1, and set for playback,
while track 2 is set for recording in stereo mode, selecting the proper stereo input (in this case, the Zoom F1 interface).
Then pressing the red REC button Audition plays the sine sweep on the two ears and simultaneously records the signals form the two microphones, as shown here:
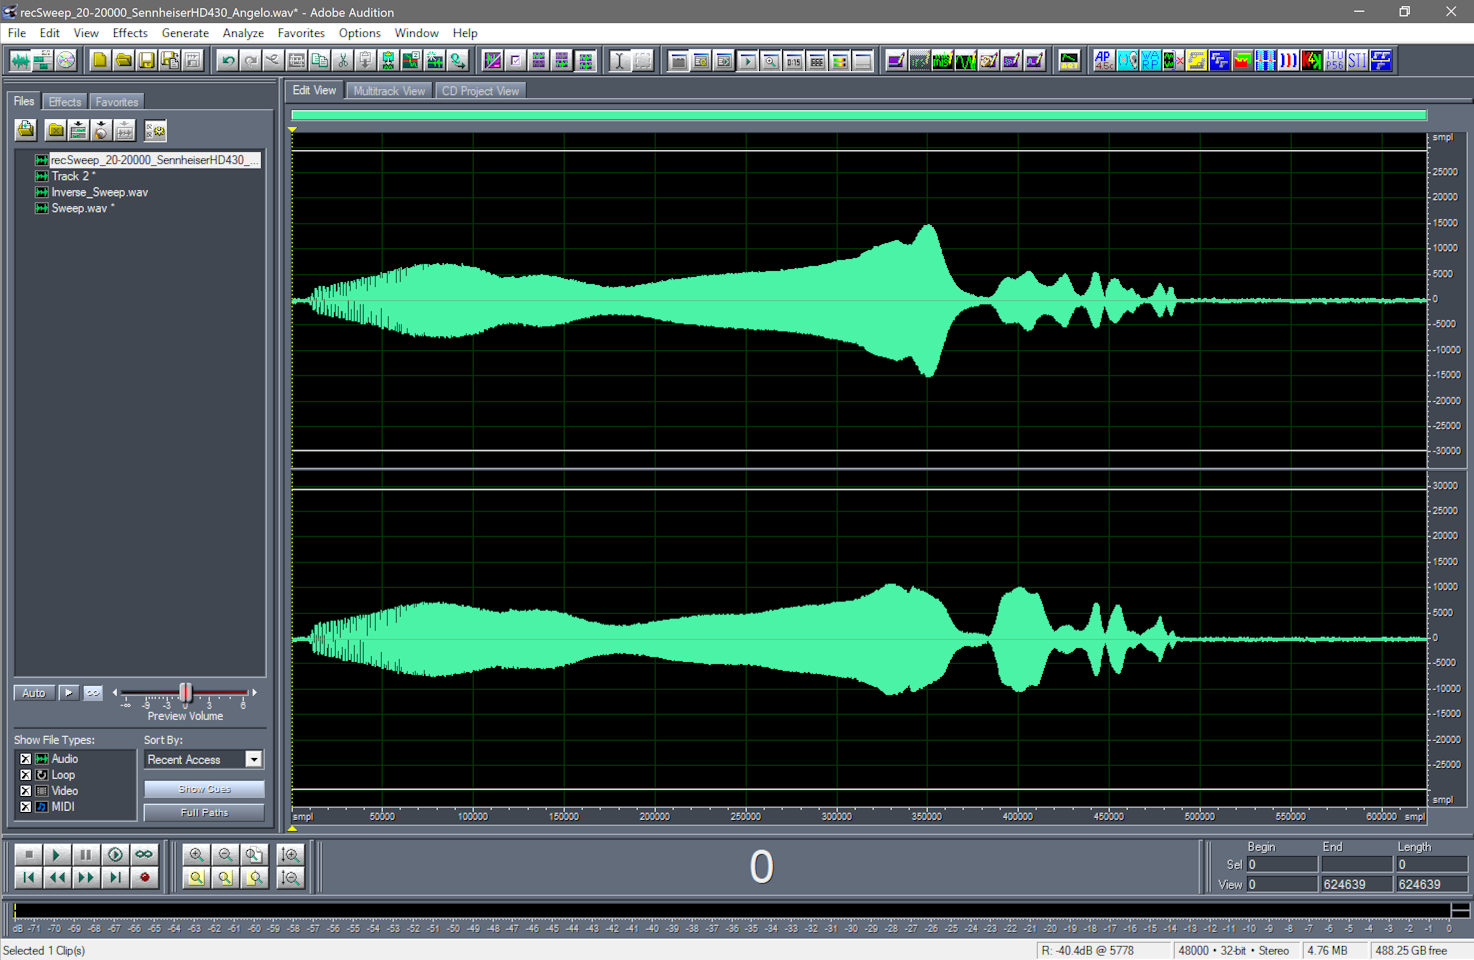
After the sweep is finished, the recording is stopped and the recorded stereo track is displayed in Edit view:
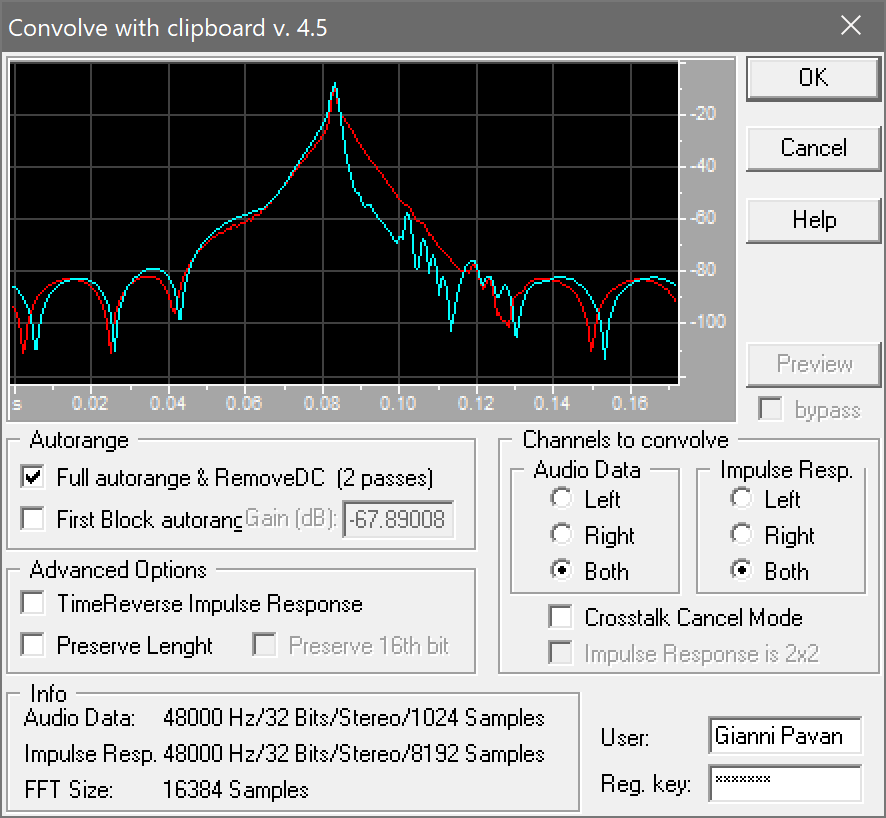
We can now deconvove the impulse response, by convolving the recorded sweep with the Inverse Sweep, which is still in the WIndows clipboard. The convolution is performed invoking the Aurora Convolve with Clipboard plugin:
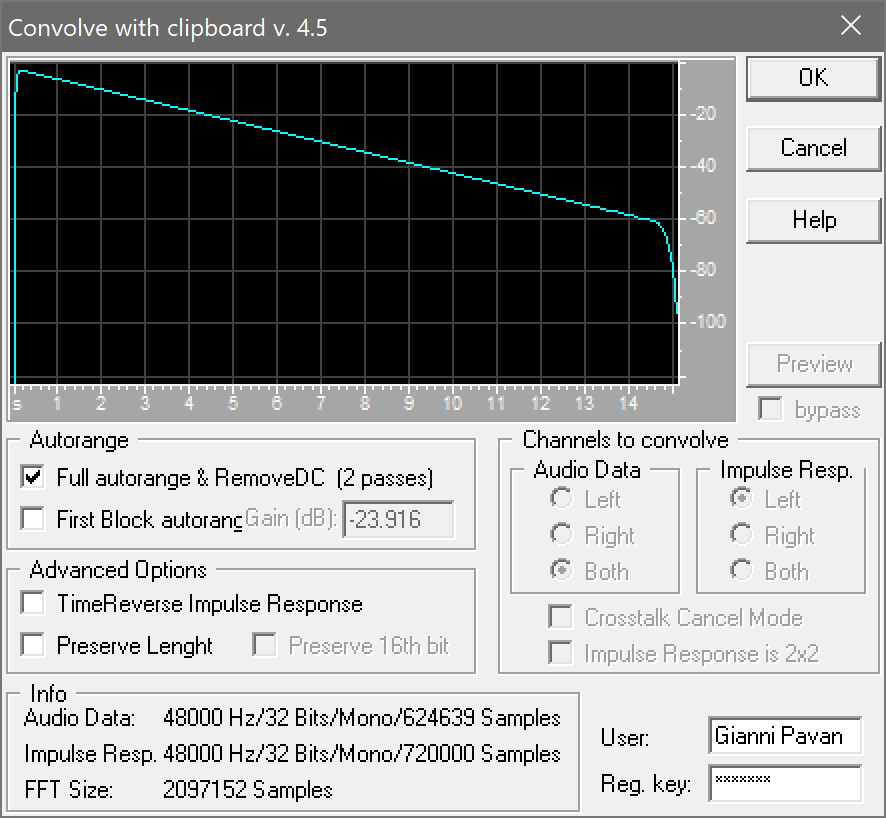
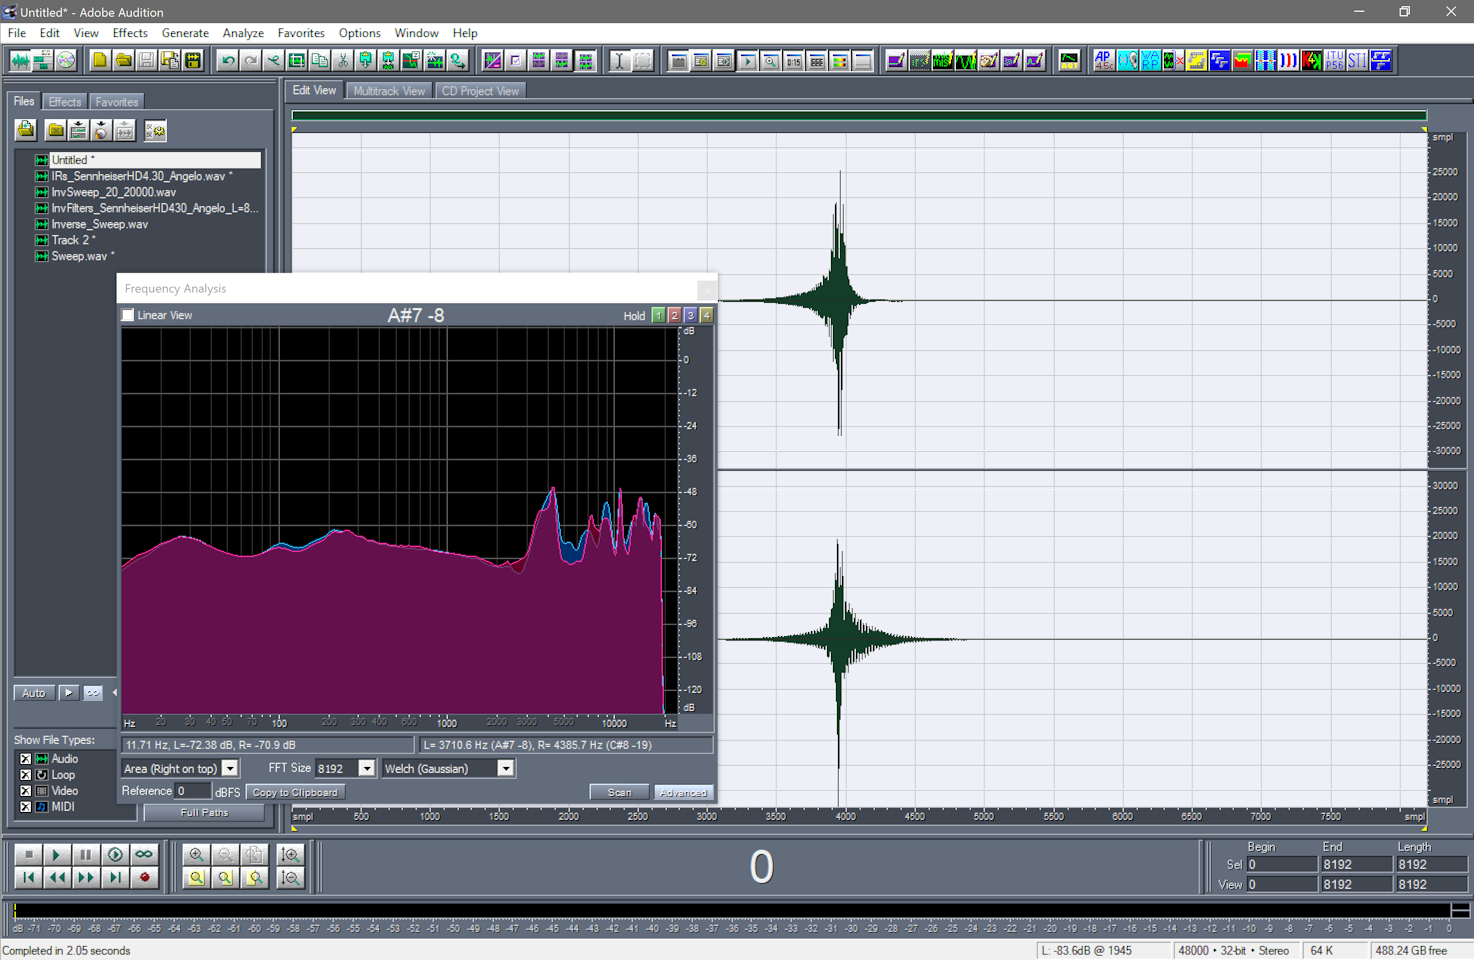
As shown, the Full Autorange is selected. The result of the convolution is a very long audio track, but we can select and trim just the portion around the main linear peak, as shown here, where a portion of just 1024 samples was selected:
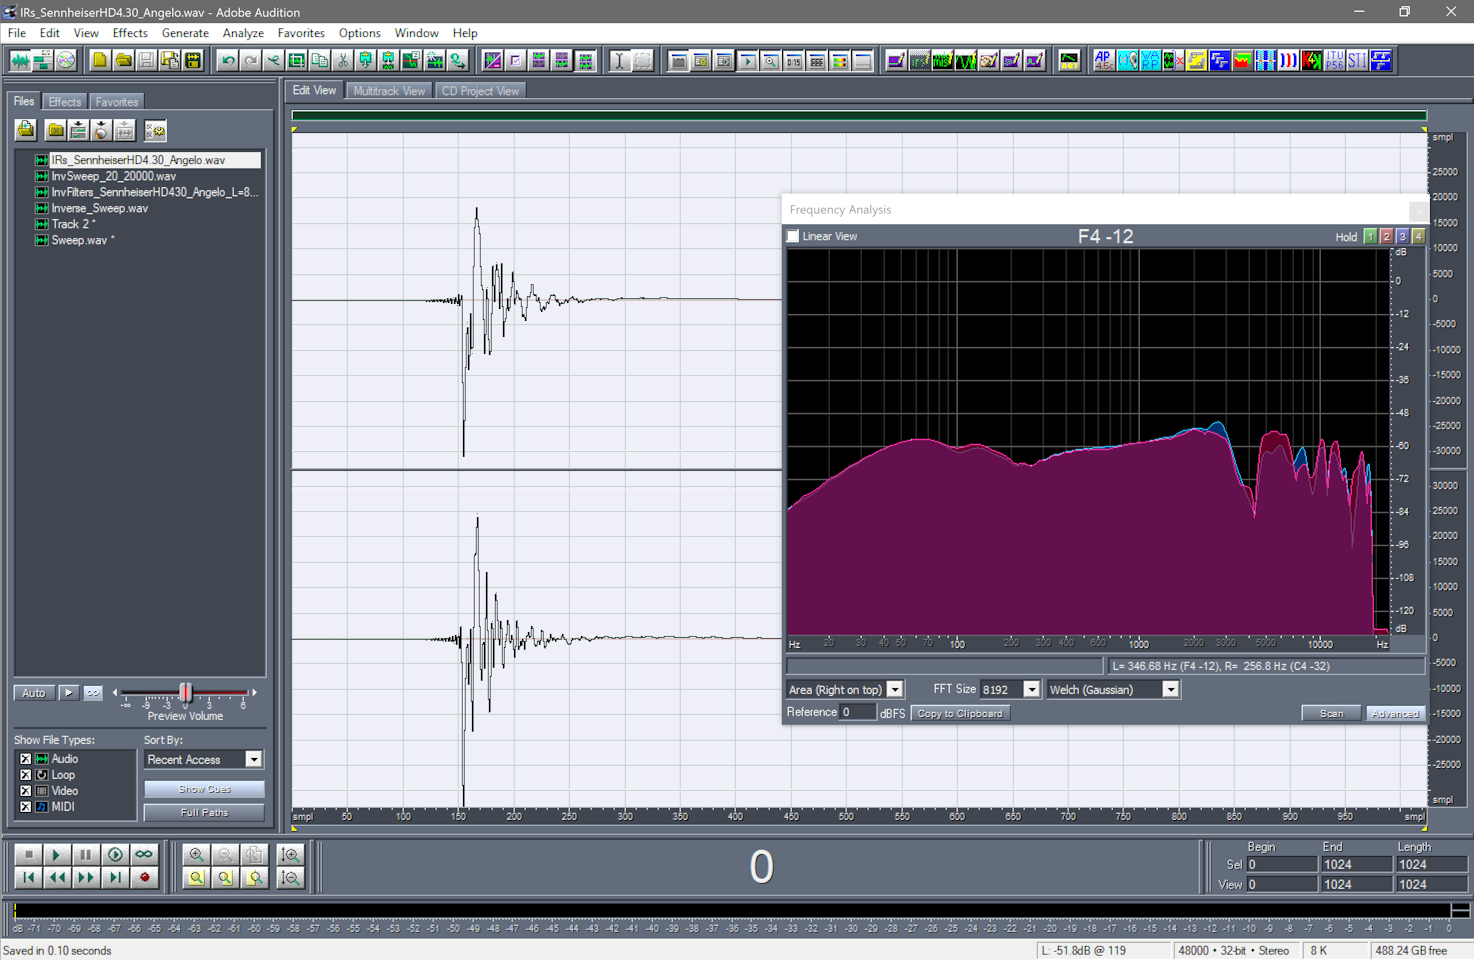
The spectrum shows a number of peaks and valleys: these come from the pinnae of the subject, not from the headphones...
Now we can compute the inverse filters, invoking the Aurora Invert Kirkeby plugin:
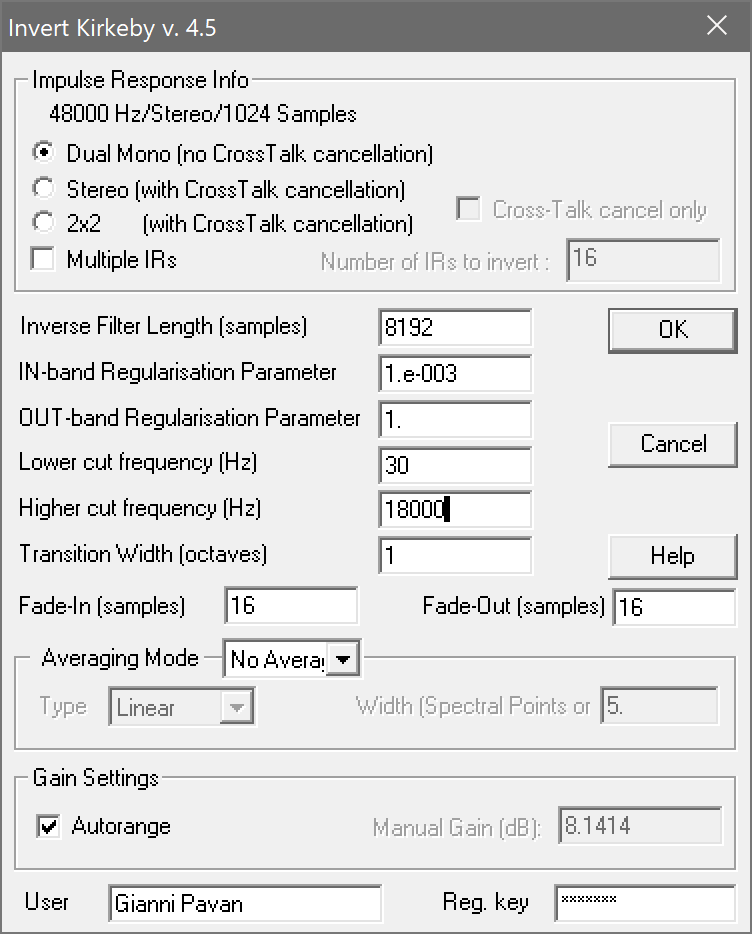
Here the result when pressing on OK:
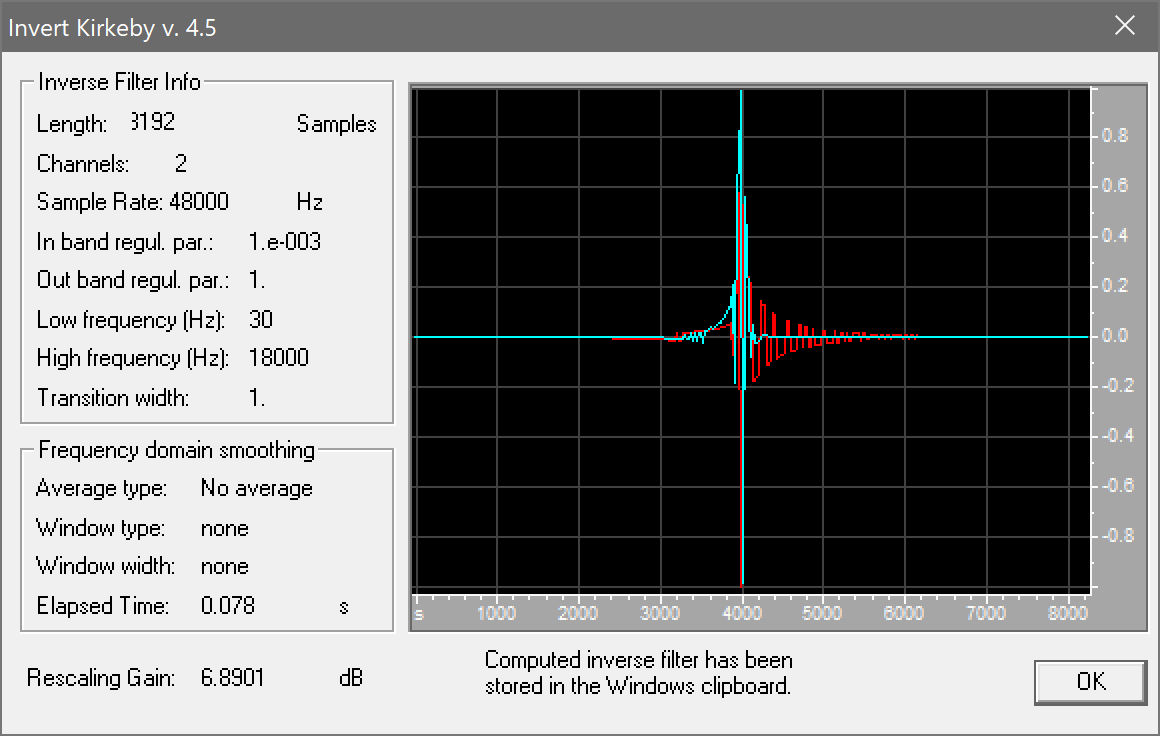
As shown, the inverse filters have been computed and saved onto the Windows clipboard. From there we can retrieve and save them in a WAV file using the Edit - Paste to New command:
For checking how well these inverse filters behave, we come back to the measured impulse responses of our headphiones + ears, and we apply the Convolve with Clipboard plugin, so that we equalize them with the inverse filters.
Here you can see the result of the convolution:
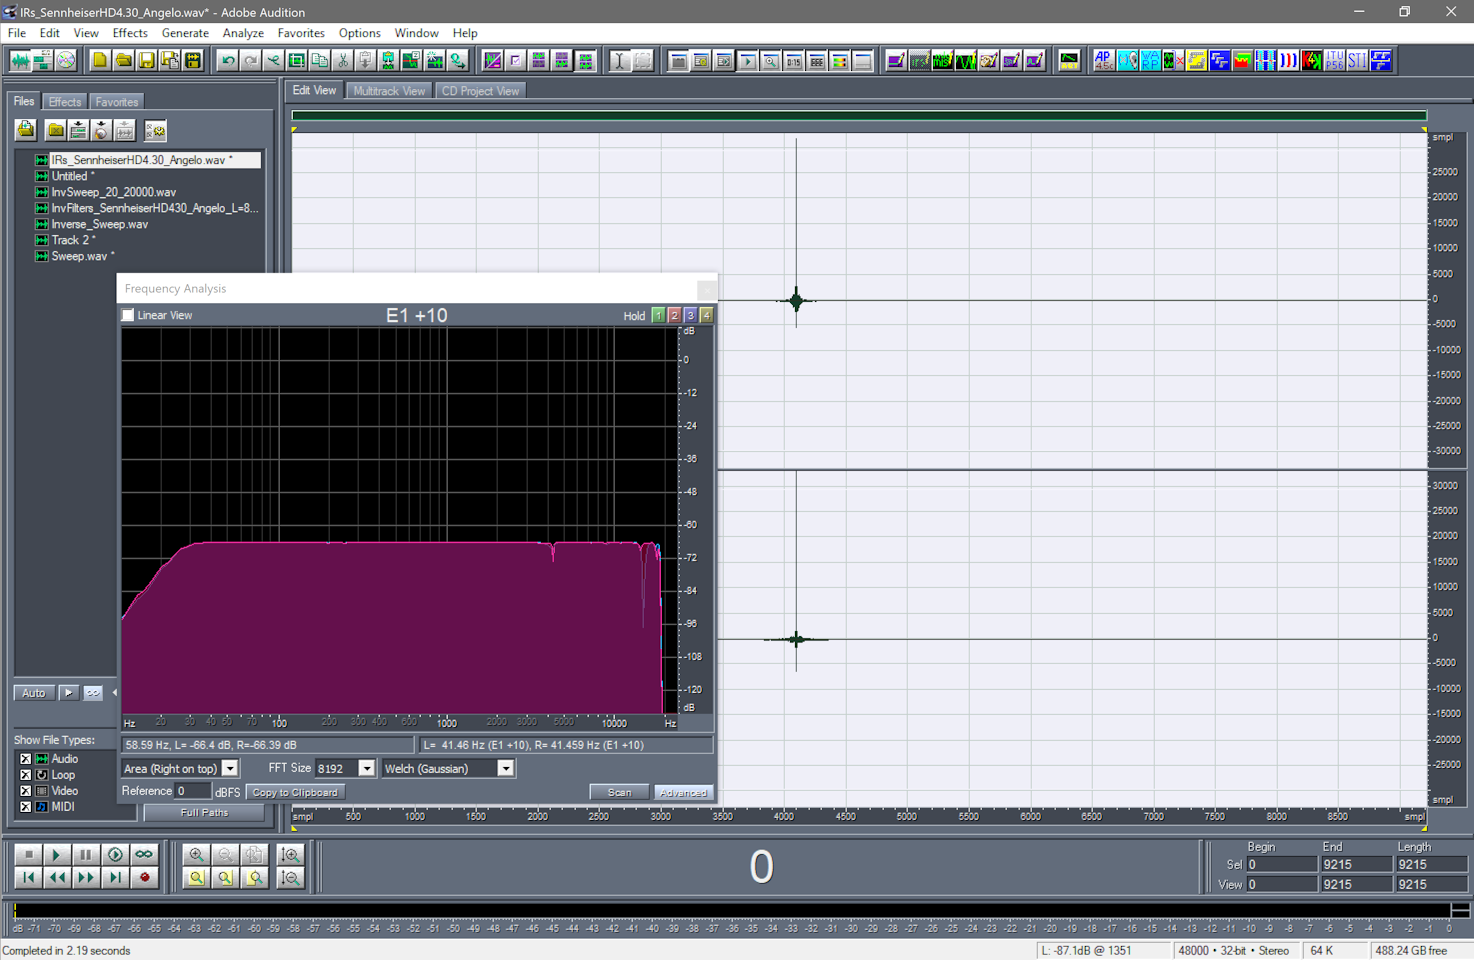
It can be seen how the impulse responses are now very close to perfect Dirac's Delta functions, and that the frequency response has been flattened almost perfectly.
So we have now a stereo FIR ilter which equalizes perfectly the headphones on our head and pinnae.
The EQ filters obtained can now be used for equalising yoor binaural soundtracks.
There are basically two ways of using them:
1) pre-filtering your binaural recordings using Audition and the Convolve with Clipboard plugin
2) real-time filtering the binaural signals being obtained by a binaural rendering plugin
The case 1) has already been described at the end of previous chapter, when we convolved the measured IRs with the inverse filters. Now instead of the measured IRs, you simply open your binaural recording, and convolve it with the clipboard (where of course you have copied the EQ filters). Only trick is to specify that the convolution has to be done selecting both channels of Audio Data and of Impulse Responses (filters), as shown in the screenshot in the previous chapter. DO NOT SELECT the Crosstalk Cancel Mode, this is for loudspesker reproduction, here we are addressing headphones, which have virtually no crosstalk.
So we present here case 2). We assume one has a good HOA recording. In this case it is a third order Ambix soundtrcak (16 channels) obtained recording an opera on-stage using an Eigenmike-32(TM). We want to listen to it with our headphones, and using an Mbientlab MMR headtracker, driving the IEM Scene Rotator plugin employing Hector Centeno's OSC bridge named MMR2OSC.
The host program employed for cascading the required plugins is Plogue Bidule. The plugin employed for performing realtime convolution (in Diagonal mode) is X-MCFX Convolver.
Here the Bidule patch for this realtime binaural rendering with head-tracking:

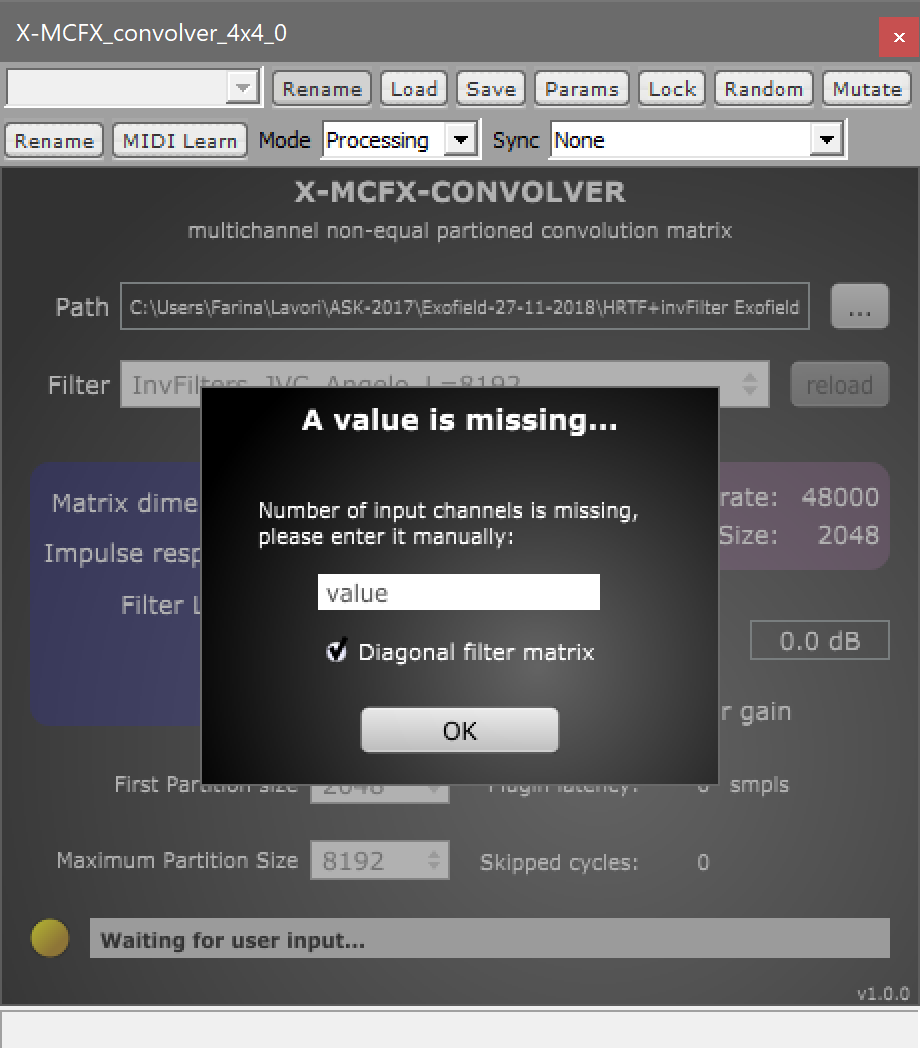
The only trick is to specify that the filter set is
"diagonal", meaning that each of the two inputs to X-MCFX has to be convolved
with just one filter and sent to the corresponding output.
This is done when selecting the filter matrix to be employed in X-MCFX. One first
clicks on the button with three dots and navigates to the folder containing the
filter(s).
Then clicking on the Filter drop-down menu, one selects the proper WAV file containing the filter matrix. At this point the following pop-up windows appear, asking for the number of input channels or for the "diagonal" option. Of course we select the second one:
After clicking OK, X-MCFX displays the following info, showing that the filters have been loaded correctly, and that the signals are being filtered properly:
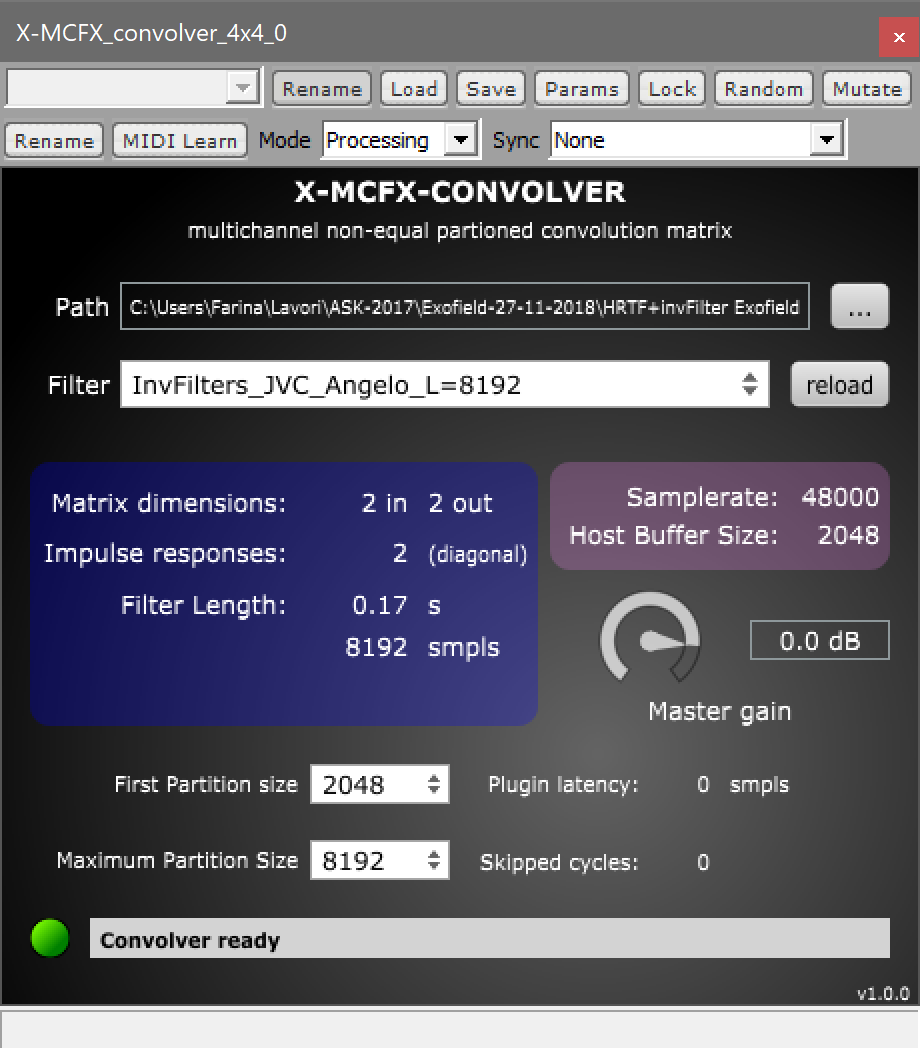
If required, one has to adjust the Master gain control for avoiding clipping at the output of X-MCFX.
The CPU load caused by the convolution of these two short filters is truly minimal, so this approach can be used even on old computers with limited capabaliities, thanks to the super-efficient convolution algorithm employed in X-MCFX.
All the contents are Copyright by Angelo Farina, 2021